Step 1: Set up your artist profile
Create an Account
Claim Your Artist Name
Complete Your Profile Details
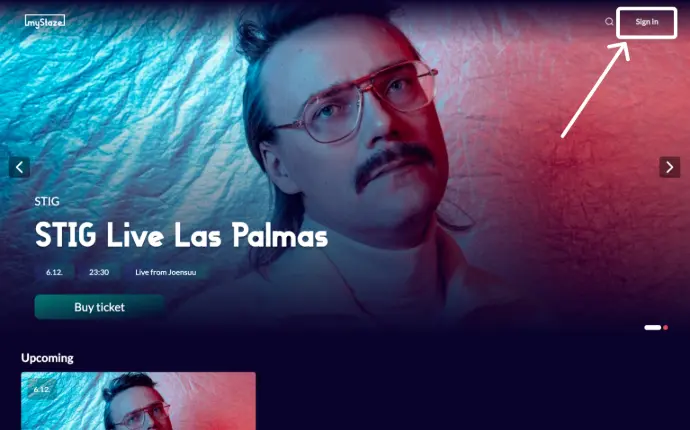
- Go to myStaze: Open the myStaze homepage.
- Click the “Sign In” button found at the top-right corner of the homepage.
- Choose your sign-up method: Use Gmail, Apple, Facebook, or create an account with your email and password.
- Verify your email: Check your inbox for a verification email and click the link provided.
Claim Your Artist Name
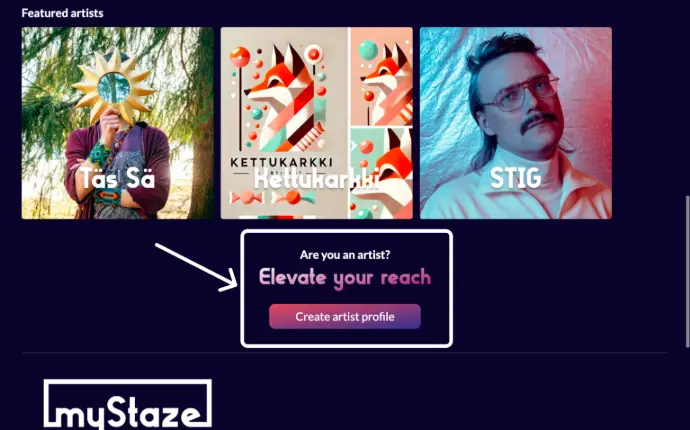
- Return to the myStaze homepage once your email is verified.
- Scroll down to the ‘Are you an artist?’ section and click on 'Create Artist Profile’ or go to the footer and click on ‘myStaze Artist’.
- On the Welcome to the Artist Profile page, read about the myStaze Artist Portal.
- If you’re ready to proceed, click “Get Started with My Profile.”
- On the Artist Profile Creation Page, follow these steps:
- Enter your desired artist name.
- Approve your custom myStaze URL.
- If your artist name is already in use, either adjust your name or create a unique URL for your profile.
- Our team will verify your artist name. For well-known names, we may reach out via social media for confirmation.
Complete Your Profile Details
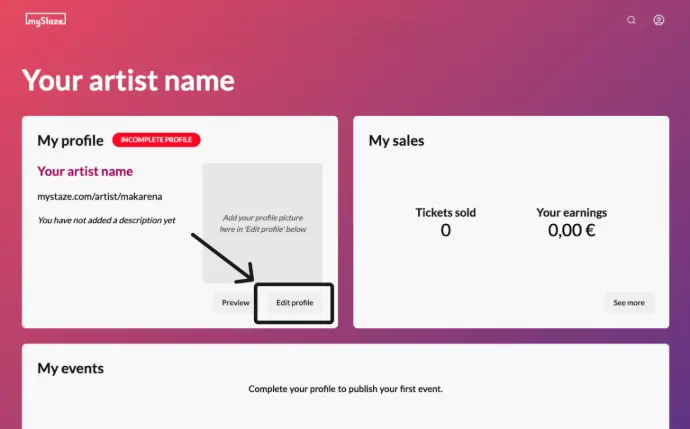
- Once approved, go to your Artist Portal: Access it from the user account menu at the top-right corner after signing in.
- Click ‘Edit Profile.’
- Complete the following steps:
- Set up your Stripe account to receive payments.
- Write a captivating bio to introduce yourself to audience.
- Upload the same high-quality image for both profile and cover, sized differently.
- Submit your profile for review: We’ll review your profile within 1–2 days.
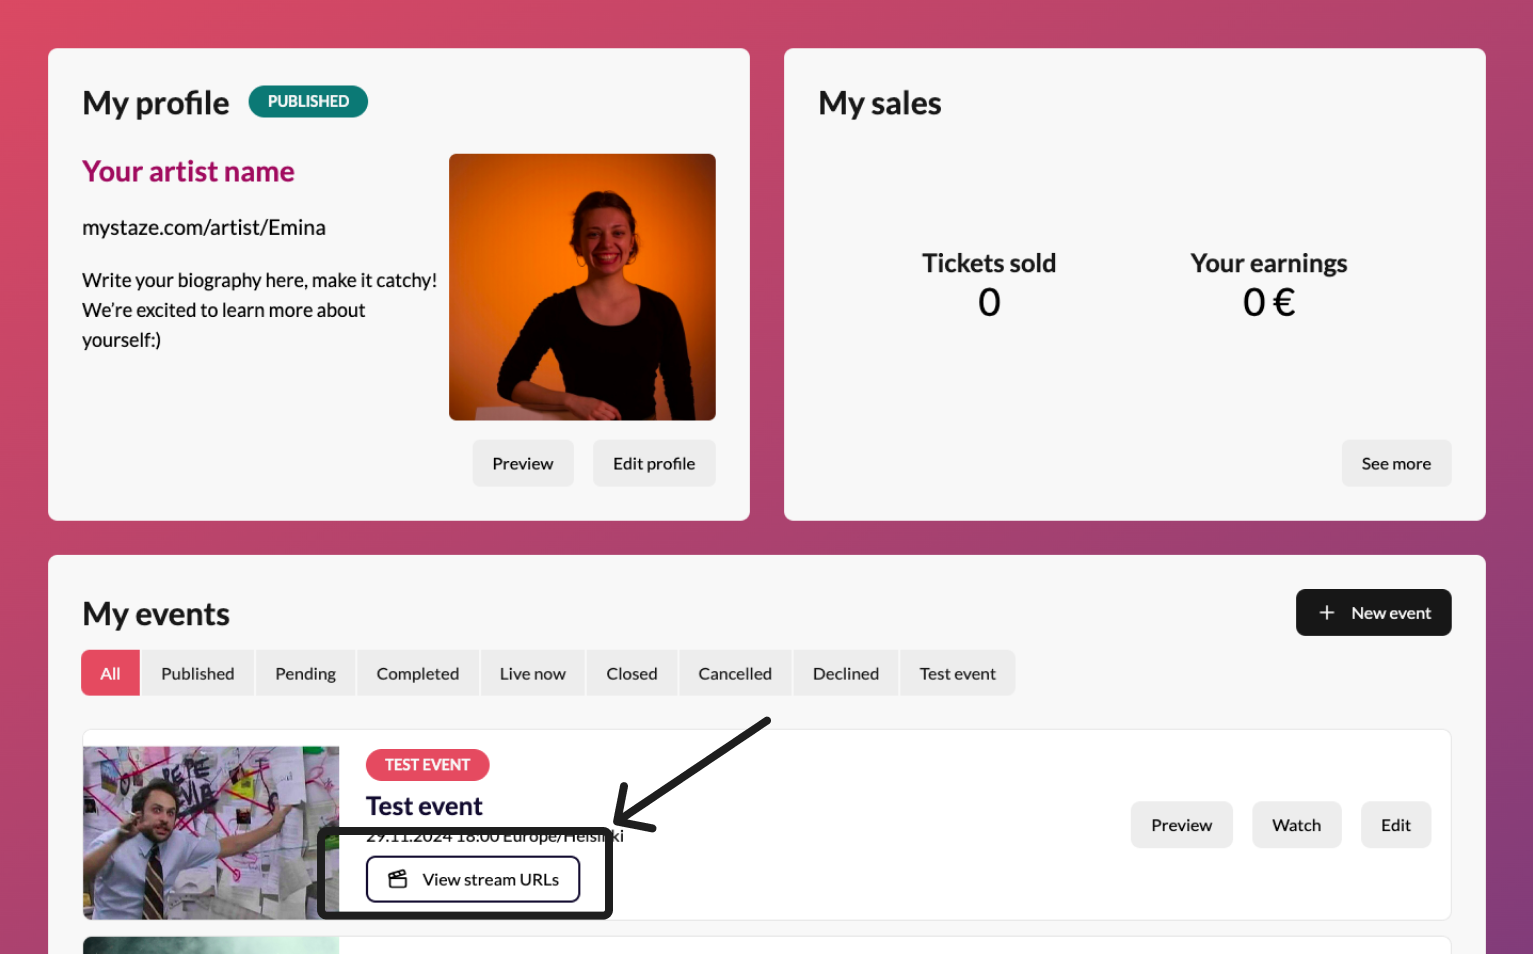
Step 2: Create a test event
Now that your artist profile is approved, it’s time to prepare for your first event! A test event helps you simulate publishing and streaming without making it public.
Publish a Test Event
Prepare for Streaming
Publish a Test Event
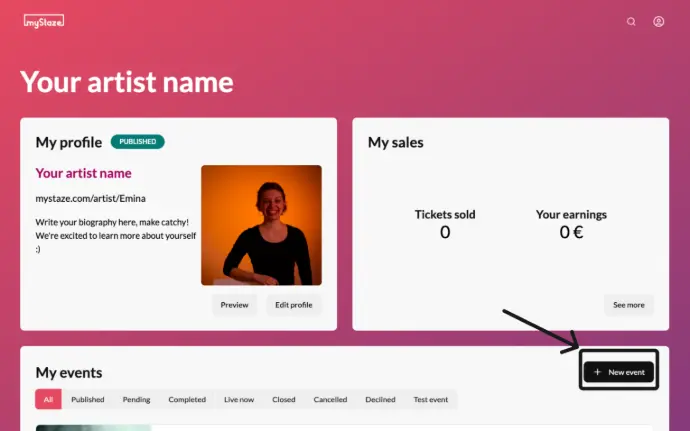
- From the Artist Portal, go to the ‘My Events’ section and click ‘+ New Event.’
- For your first event, the 'Test Event' toggle, located in the top-right corner of the screen, will be automatically locked on.
- Fill in the event details:
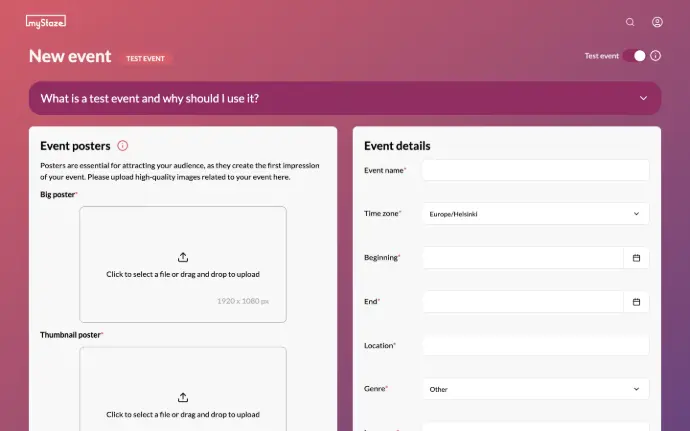
- Poster and cover images (we recommend using the same image in different sizes)
- Event name
- Time zone, date, time, and duration
- Location (optional)
- Genre and language
- Price (for simulation purposes only)
- Event description
- Submit your event: Test events are not visible to the public and will therefore not need approval from our team, but will help you understand how real events work.
Tip: Leave Room for Delays!
When creating an event or test stream on myStaze, we recommend adding extra time to account for potential delays. For example, if your show is 2 hours, set the duration to 2.5 hours. You can end the stream earlier if everything goes smoothly, but you won’t be able to extend it beyond the set duration. Plan ahead to avoid rushing or cutting your event short!
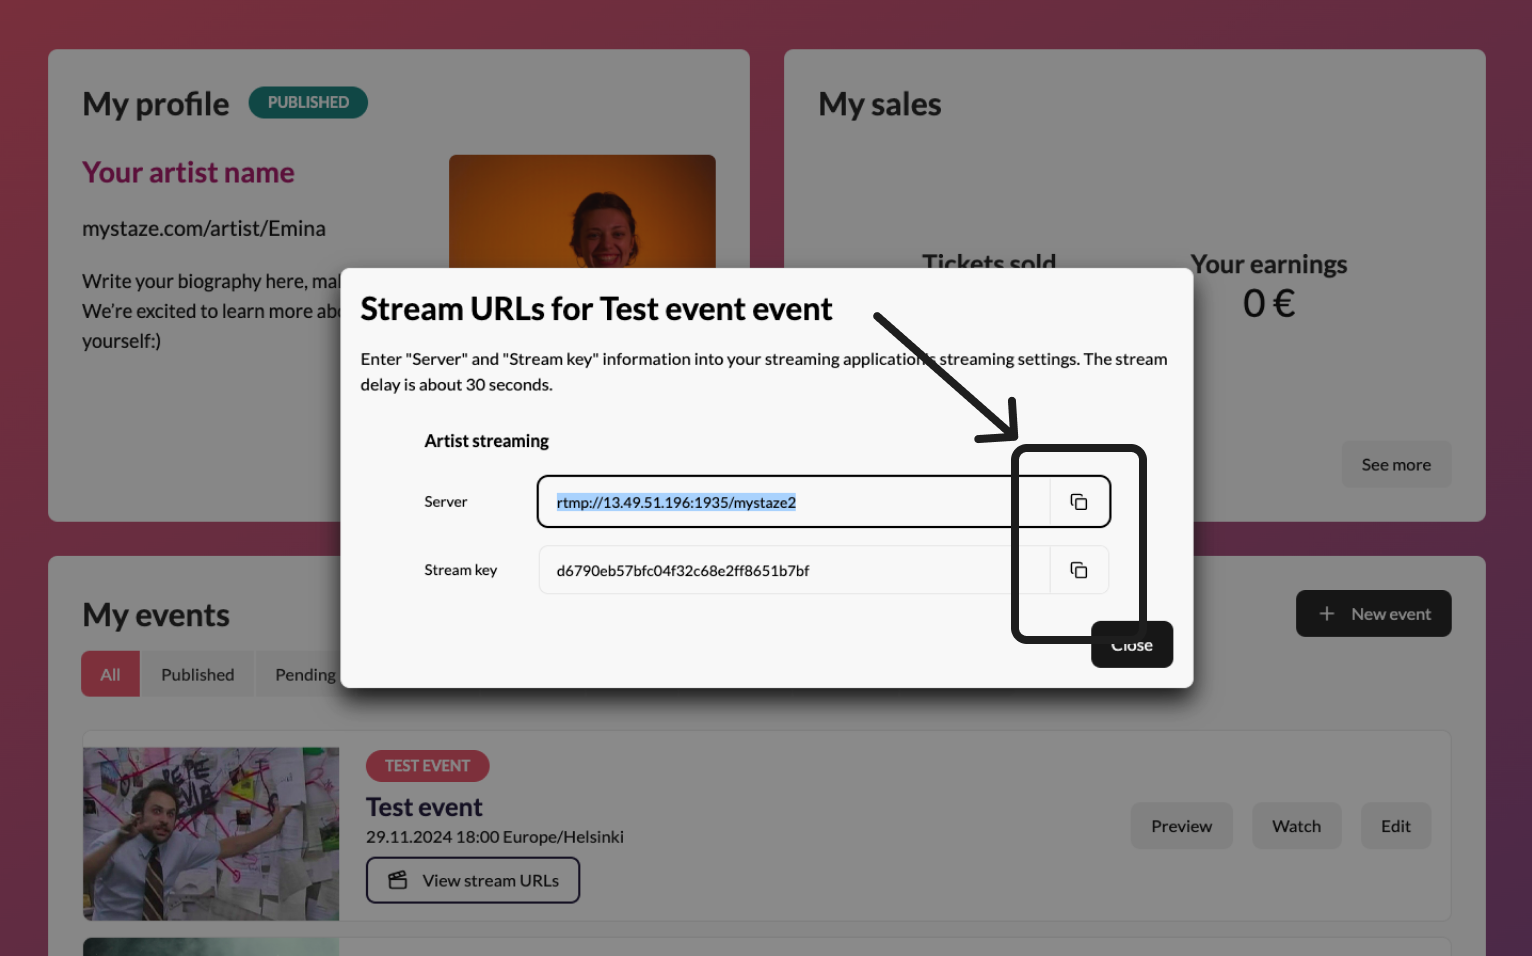
Prepare for Streaming
- Choose your streaming method:
- With a professional: Share the streaming URL and server key with them.
- Streaming yourself: Use one of the following tools:
- OBS (Free, for laptops): Download OBS
- Larix Broadcaster (Subscription-based, for phones or tablets): Learn More
- OBS + Smartphone (Free): Use your smartphone as video and/or audio source, connected to OBS on your laptop. Learn More
- Or use any RTMP-compatible software.
- Test your streaming setup:
- The URL will be available 60 minutes before the start of the event, for you to set up your equipment.
- At the time of the event, a button will appear on your test event info page to view the stream of your event from the audience side.
- Perform a dry run to ensure everything works smoothly.
- Keep in mind the 30-second delay between your stream and what your audience sees.
Important note: myStaze shares your live video feed to your audience on the platform, but streaming requires third-party software like OBS or Larix, which falls outside our responsibility.
Also, setting up equipment (camera, microphone, and software) often takes more time than expected, especially for first-timers. We recommend planning at least three times the setup and testing time you anticipate to avoid last-minute stress.
Step 3: Publish a real event
Now that you’ve mastered the test event, it’s time to go live with a real event!
Create Your Live Event
Create Your Live Event - at least 7 days before your planned performance
- Follow the same steps as for the test event.
- Optional: Add a merch link to your event description for fans to purchase items.
- Submit your event for review: We’ll approve your event within 1–2 business days.
Promote Your Event
Share your myStaze event link on social media, newsletters, and other platforms to maximise visibility.
Check our Tools & Tips (PDF) document to prepare for your event :)
Step 4: Go Live!
Before the Event
- Log in to the Artist Portal and review your event details.
- Retrieve the streaming URL and server key 60 minutes before the event.
Start Streaming
- Begin streaming on time: The link will automatically go public at the scheduled start time.
- Engage with your audience to create a memorable experience.
End Streaming
- The stream will automatically close at the event's end time.
- Plan your outro accordingly, as viewers will no longer see your feed once the event ends.
Extra: Post-Event Actions
- Check Merch Sales: If you added a merch link, review orders on your website.
- Engage with the audience: Thank your audience via social media or newsletters.
Send Feedback to myStaze:
Email us at hello@mystaze.com with the subject "Feedback for myStaze."
Post-Event Info
- Stream Recording: Available for 48 hours after the event ends form your ‘My Events’ section on your artist portal. Audiences can continue tipping during this time.
- Payouts: Your share of the income will be paid within one month after each performance.
- Income Breakdown: Learn how we allocate ticket sales in our Artist Compensation page.
- Tipping: Artists keep 90% of their net tipping revenue. myStaze retains the 10% to support platform maintenance and improvements.
Please note: All in-app purchases are final and non-refundable per the platform’s policies (Apple or Google Play). For issues or refunds, contact Apple or Google Play support. Subscription management and cancellations can be done via your Apple ID or Google Play account, with changes taking effect in the next billing cycle. We are also not responsible for payment processing or in-app purchase issues, as these are managed by third-party platforms. Please refer to their policies and support resources for assistance.